Create an Environment
Before Fluid can be installed or any workloads be deployed, an environment needs to be defined in the Fluid Console.
Create your first environment by selecting the environments tab in console. This will take you to the environments table to which you should note the “Claim your Environment” button. Clicking this button will walk you though the process of defining your environment.

You’ll notice three fields when defining your environment. * Cluster Name * Node Count * Pairing Keys
Select a lower-case alphanumeric cluster name that you can easily identify as this will uniquely identify your cluster once deployed. Next, determine your estimated number of nodes that you’re likely to deploy as part of this cluster. This pre-configures the network and simplify scale when the time comes; there’s no downside to choosing a larger node count apart from a slightly longer provisioning time.
Pairing Keys Fluid can be configured either by providing a PXE token which will automatically associate devices booting over PXE to a cluster, or manually by gathering Pairing Keys from individually booted nodes and entering them as pairing keys. If you intend to PXE boot your nodes, you can leave this field blank. Pairing keys are issued by Fluid’s ISO installer.
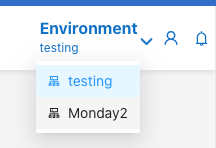
Once your cluster is created, you will need to select it from the drop down box in the top right hand corner of the console.